Author: Mamoon Ahmed

  • Set Up Dynamic DNS (DDNS) on Your Router

    Set Up Dynamic DNS (DDNS) on Your Router

    Introduction

    Dynamic DNS (DDNS) is used to access your home network from anywhere in the world using a simple domain/web address, if your public IP address changes continuously. This is mostly used if your ISP gives you a connection type in dynamic IP that changes often. With Dynamic DNS, you don’t need to remember your continuously changing IP address you just use your custom domain name like myrouter.ddns.net to reach your network devices, such as cameras or servers, remotely.
    Here’s a simple and easy tip on how to set up Dynamic DNS on your router.

    Step 1: Choose a Dynamic DNS (DDNS) Provider

    Before configuration, you will need to register with a DDNS service provider. Some popular Provider:

    • No-IP (offers both free & paid plans)
    • DynDNS (It’s paid)
    • DuckDNS (It’s free)

    Sign up with your DDNS providers, and create a new hostname, like myrouter.ddns.net, that you will use to access your home network from outside.

    Step 2: Open Your Router Setting

    1. Connect to your router through an Ethernet cable or Wifi.
    2. Open any web browser and enter your router’s IP address in the URL search bar (the most common default IP addresses are 192.168.0.1 or 192.168.1.1).
    3. Log in to the home router’s admin panel. If you haven’t changed the username and password before. It is mostly something like admin for both the username and password (check your router user manual if you’re confirmed).

    Where is Locate the DDNS Settings option

    1. Once you’re logged in to your router, search the Dynamic DNS (DDNS) settings. This is mostly found in  Advanced Settings or Internet Settings, it depends on your router model.
    2. Find Dynamic DNS and enable it by clicking Enable.

    Configure DDNS on Your Home Router

    1. Select DDNS Provider: In the router’s Dynamic DNS settings, select the DDNS provider you signed up with for example No-IP, or DynDNS.
    2. Enter Account details: You will need to enter on your router DDNS setting
      • Your Username, Email, Password, and Hostname you created.

    Also Check: The Main Difference Between Modems and Routers

    Test the Setup

    1. To test whether the Dynamic DNS configuration is working, disconnect your mobile device from your home Wifi and switch to mobile data or another network.
    2. Open the web browser, and enter your Dynamic DNS hostname (myrouter.ddns.net).
    3. If everything is configured correctly, this remote address should take you back to your home wifi network, it’s allowing you to access your devices remotely from anywhere.

    Extra Tips

    • Port Forwarding: If you want to access connected devices on your network like security cameras or multimedia servers, you will need to configure port forwarding on your router.
    • Security: Upgrade your router up to date and you may need to add extra protection like a firewall or VPN to secure your network.

  • WDS Bridge Configuration in routers

    WDS Bridge Configuration in routers

    Introduction

    Wireless Distribution System (WDS) is an option that allows wireless networks to be connected without the need for cables. Simply, the WDS method allows multiple (APs) to communicate with each other, providing smooth network signal coverage over a large area. WDS works by creating wireless bridges between the routers, which increase the range of a wireless network without loss of bandwidth.
    In this article, we will discuss how to configure a WDS bridge configuration in a router, let’s explore the benefits of WDS, and outline the step-by-step method to set up WDS between two routers.

    What is WDS?

    WDS abbreviation Wireless Distribution System, allows the interconnection of APs/Access Points in a wireless network. WDS enables wireless routers to extend a network without cable connections between the routers. This is mostly useful in larger homes, buildings, or areas where running wires would be impractical.

    In a WDS, routers can act like as either:

    • WDS Access Point (Root Access Point): This is the first main router that connects directly to the internet. It handles multiple services like DHCP, NAT, and bandwidth traffic.
    • WDS Station (Repeater or Bridge): This is the second router that extends the network signals by wirelessly connecting to the access point (APs).

    Benefits of WDS Bridge Configuration

    1. Extended Wireless Signals: WDS bridges allow users to extend the wifi range.
    2. No Cables Required: If you unlike cables, WDS allows wireless connectivity between routers, which saves effort and cost.
    3. Smooth Roaming: Devices can auto-switch between APs within the WDS Bridge without losing their connection, which is especially useful in large homes or offices.
    4. Cost-effective Solution: Using WDS bridge configuration helps save the cost of deploying extra routers and cable network infrastructure.

    Before Setting Up a WDS

    Before starting the setting of WDS, you need the following:

    •  You need two wireless routers or APs that support WDS mode. Routers from the same manufacturer or models have better compatibility, but a different or cross-brand setup is also possible.
    • The SSID (WiFi name), channel, and wireless security settings (usually WPA2) of both devices should be the same.
    • Make sure that both devices are within wifi range of each other.
    • Use Static IP addresses in the router to avoid any IP address conflicts.

    How to Set up WDS Bridge Configuration

    Step 1: Access the Router’s Web Interface

    1. Connect your PC to the router (Router A, the main access point) using wire or Wi-Fi.
    2. Open any browser and type the router’s IP address (mostly 192.168.1.1, 192.168.0.1 or 192.168.10.1) into the URL bar.
    3. Log in to the router admin panels by using the admin username and password. The default username and password are in the back side of the router or user manual if you change it please use your custom username and password.

    Step 2: Configure the Router A (Main Access Point)

    1. Search the Wireless Settings or WDS Configuration Setting section in your router’s admin panel.
    2. Set up the wireless mode as AP or (Access Point) mode.
    3. Set the wireless SSID name, security (WPA2), and password.
    4. Disable the DHCP server on the WDS router/second router.

    Also Check: How to configure internet settings in Router PPPoE / Static IP / Dynamic IP

    Step 3: Configure Router B (Second Router/Bridge)

    1. Log in to the second router using the IP address.
    2. Search to the Wireless Settings or WDS Configuration setting.
    3. Enable the WDS bridge setting and select the same channel as the main Router.
    4. Set the Wifi name and wireless security settings like as main Router configuration (SSID or wifi name, and password).
    5. In the WDS Settings option, you should see an option to (Add WDS Peer) or (Enter MAC Address). Input the MAC address of main Router A.
    6. Assign second Router B a static IP address that is in the same subnet as main Router A (for example, 192.168.0.3).

    Step 4: Testing the Connectivity

    1. Save the configurations on both routers and restart it.
    2. After restarting, check the status in the router status section. The router will show successfully connected via WDS Bridge.

  • Main Difference Between Modems and Routers

    Main Difference Between Modems and Routers

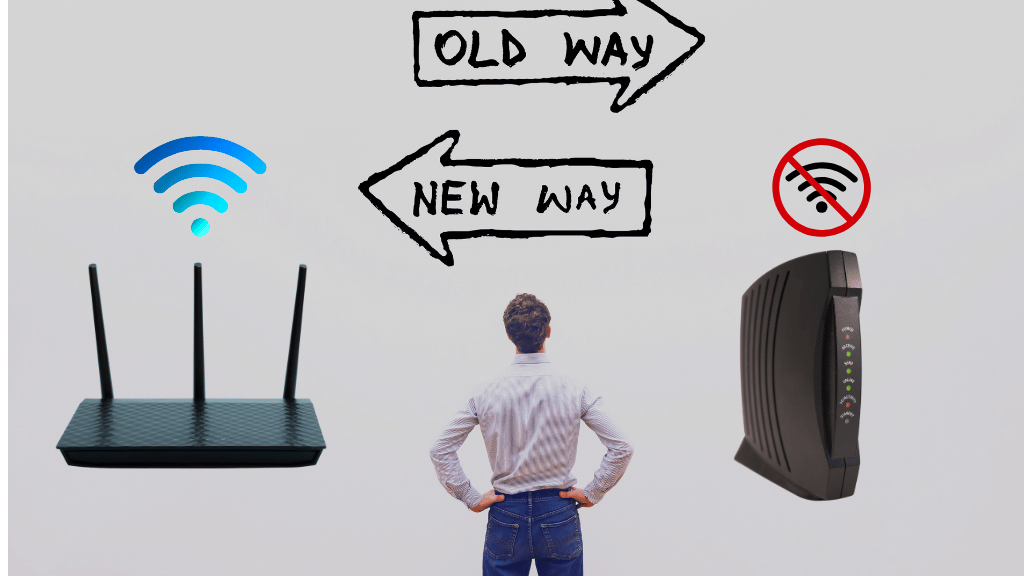
    Modems and routers are useful devices in our home or business network but are used for different purposes. Understanding the difference between modems and routers is very important because of how to manage our network.

    Modem:

    A modem stands for modulator & demodulator. It is used to modulate and demodulate analog signals, allowing computers to communicate with analog transmission lines. In the home internet connections, a modem is used as a bridge between our Internet Service Provider (ISP) and our local network. However, modems usually do not have the ability to manage local networks or distribute the internet connection to more than one device.

    The primary functions of a modem are:

    Signal Conversion:

    Modems convert digital signals from our computer or network to analog signals for communication over the ISP’s network.

    Establishing Connection:

    Modems maintain a connection with our ISP, allowing you to access the internet. Different types of modems are used for many types of internet connections, like DSL (Digital Subscriber Line), cable, fiber-optic, or satellite.

    Physical Connectivity:

    Modems have ethernet ports to connect to network devices, such as a computer or a router, by using Ethernet cables.

    Router:

    Routers are used to create and manage a local area network (LAN) within your house or business. They assign unique and local IP addresses to network devices on the network, to allow communication between two or more devices.

    The primary functions of router are:

    Local Network Management:

    Routers are used to create and manage a local area network (LAN) within your house or business. They assign unique and local IP addresses to network devices on the network, to allow communication between two or more devices.

    Packet Routing:

    Routers find the most efficient path for packets to travel data between devices on the local network.

    Firewall and security:

    Routers have also included firewalls that help protect your local network from unauthorized access and security threats from the internet.

    Wireless connectivity:

    Many modern routers have wireless feature (Wi-Fi), allowing network devices to connect to the internet without physical wire.

    Gateway:

    In some time, internet service providers (ISPs) provide a single device that works both like a router and modem. This device is the combination of a router and modem its also called a combo device or Gateway.

    Functionality:

    A modem is used to connect your local network to the internet, and a router manages the flow of data between your local network.

    Connections:

    A modem is used to connect to your ISP’s network, while routers connect devices between your local network.

    IP Addresses:

    Routers give local IP addresses to multiple devices in your network, while modems are used for the external IP address provided by the ISP.

    Key Difference:

    Functionality:

    A modem is used to connect your local network to the internet, and a router manages the flow of data between your local network.

    Connections:

    A modem is used to connect to your ISP’s network, while routers connect devices between your local network.

    IP Addresses:

    Routers give local IP addresses to multiple devices in your network, while modems are used for the external IP address provided by the ISP.

  • Create secure google account for YouTube Channel

    Create secure google account for YouTube Channel

    Step by step instructions to Create a New Gmail / Google Account

    Create a secure Google account. How long have you been utilizing Outlook? Or on the other hand Hotmail? It is safe to say that you are burnt out on the restrictions of these records, and do you want greater usefulness from your email customer?

    Gmail has been around starting around 2004, however not every person has taken action at this point – individuals don’t care for change. Be that as it may, there are many reasons you ought to consider moving to Gmail. It’s no big surprise that 1.5 billion clients have decided to utilize Gmail as their essential email customer. Advantages of Creating a Secure Google Account

    Advantages of a Gmail Account

    1. It’s free to create.

    2. It has phenomenal spam channels and keeps your inbox cleaner than some other email customers.

    3. It has an exceptionally liberal extra room recompense, 10+ GB of email extra room.

    4. You can easily change your subject and the way your inbox works (there’s more adaptability than with some other email customer/user).

    5. Innumerable modules and expansions are accessible and allowed to be utilized. These can assist you with altering your work process and how you use email.

    6. You have the force of Google search usefulness just inside your inbox.

    7. Effectively Accessible – your record can be gotten to any place where there is web access.

    8. It’s dependable and once in a while crashes.

    Step-by-step instructions to Set Up Your New Gmail Account

    Stage 1. First of all, you wanted to make a beeline for gmail.com.

    Stage 2. Snap on the button that says “Make Account.”

    Gmail Account
    step one for Gmail account

    Stage 3. From that point forward, the sign-up structure will show up. You’ll have to fill in every one of the subtleties it demands a first name, last name, a new username, and another secret key.

    Create Your Gmail Account
    Step 2

    Stage 4. Then, you’ll be approached to enter a telephone number to check your record. This is because Google utilizes a two-venture check cycle to help security. You can discover more about the two-venture check here.

    Stage 5. You should now get an instant message with a check code from Google. On the off chance that this hasn’t been conveyed within a couple of moments, you can utilize the mechanized call framework all things considered.

    Stage 6. Whenever you’ve checked your record, you will see a structure that requests some close-to-home data. This incorporates a recuperation/Recovery email, your birthday, and your sex/gender. Assuming you’re not happy giving these or need to discover the reason why Google is requesting this data, there is a lot of data on offer during the signup.

    Fill Date of birth
    Step 3 for Gmail account

    Stage 7. You presently need to acknowledge Google’s Terms of Service and their Privacy Policy – it’s energetically suggested that you audit both of these exhaustively prior to clicking “I Agree.”

    Stage 8. Now enjoy your new Gmail account.

    After All Please Turn on 2-Step Verification.

    1: Log in to your Google account.

    2: Then tap on Security Option.

    3: Click the Two-Step verification option.

    4: Enter your mobile number.

    5: Check your mobile phone you will receive a code.

    6: Enter the code into your Gmail account.

    7: Use the turn-on option for activation second and security purposes.

    Thanks This is the First Article For the YouTube course.

  • Remove background Remove bg online without any Software

    Remove background Remove bg online without any Software

    There are two methods two remove your image background by just clicking PickWish and Remove bg

    Remove bg

    Save Your Time and Money with Remove bg

    What amount of time does it require to remove a background? Significantly more?

    Remove your image/pic background by PickWish and Remove bg.

    With removing bg, you will remove the background in just 5 seconds. The site is programmed and easy to use.

    Indeed, you can imagine something completely different while our Artificial Intelligence AI disposes of your picture foundations.

    No green screen required to remove bg

    With remove.bg, there’s no requirement for chroma-keying / Green Screen conditions under those impeccably tuned lighting conditions.

    Simply shoot where aye you: before a white divider, on a bustling junction, or with the night sky behind the scenes. You don’t need a green screen for removing the background at home, office and anywhere.

    Be that as it may, assuming you truly need a screen, eliminating chroma-keying/green screen foundations works as well, green or not.

    Be that as it may, why go through your days clicking pixels when Artificial Intelligence AI could do the responsibility for you and your image in only 5 seconds?

    Save your hours to take unique shots – leave the pixel work to us.

    Release your innovativeness by removing bg.

    Rather than losing hours with too much work, eliminating foundations is presently pretty much as very speedy as just clicking a button.

    remove. bg incorporates Photoshop so you can use our AI to adjust settings and accelerate your work process.
    very high quality

    Regardless of whether you’re altering item photographs or representation shots: remove bg handles the difficult edges of your picture, similar to hair and other conditions, uncommonly well.

    Get a straightforward foundation for any picture. Transfer a document or attempt one of these:

    PicWish

    With the Picwish website, you can remove the background of your image with just one click. and also set a new background image. pic with gives you many other options like crop edit you can crop your image and edit your image. The best way to remove bg is with any software like Photoshop. This site uses Adobe in the background process.

    PicWish just tap to visit the site

    Remove bg Click to visit

  • Mikrotik Dual WAN Failover Netwatch | What Is ISP Failover

    Mikrotik Dual WAN Failover Netwatch | What Is ISP Failover

    What is ISP Failover:

    ISP failover is a networking setup that is used to ensure continuous Internet connectivity by employing multiple Internet Service Providers (ISPs). In case of a primary ISP failure due to factors like outages or equipment issues, the system automatically switches to a secondary ISP. This automated process is often triggered by network monitoring tools, which help minimize downtime and ensure uninterrupted access to critical online services. ISP failover is crucial for maintaining business continuity and enhancing network reliability, it offers a seamless transition to an alternate provider in the event of an outage with the primary ISP.

    Current Solution With Netwatch:

    Currently, the Netwatch tool is being broadly utilized to screen the Internet associations of WAN connections by taking a look at a remote host rather than the close-by door. It works habitually by sending an ICMP demand parcel to a host on the internet. Prearranging is meant to weaken or strengthen default routes by examining their feedback when issues arise with remote hosts.

    One might say that such prearranging isn’t difficult to achieve for experts who need to execute network arrangements with failover for their clients yet they don’t think a lot about prearranging. They like to just design using Winbox with GUI

    Remote hosts (i.e. 8.8.8.8 on the ISP1 gateway and 8.8.4.4 on the ISP2 gateway) you can add and always be available for the Netwatch tool’s tasks in Mikrotik.

    Remote hosts (i.e. 8.8.8.8 on the ISP1 gateway and 8.8.4.4 on the ISP2


    gateway) you can add and always be available for the Netwatch tool’s tasks in Mikrotik.


    For ISP 1:

    /ip route enable [find comment=ISP1]

    /ip route disable [find comment=ISP1]

    Courses for remote hosts (for example 8.8.8.8 using the ISP1 passage and 8.8.4.4 through the ISP2 entryway) should be added and consistently accessible for the Netwatch instrument’s errands.

    For ISP 2:

    /ip route enable [find comment=ISP2]

    /ip route disable [find comment=ISP2]

    The default root with the ISP1 remark is crippled when the Netwatch doesn’t get an ICMP reaction parcel for a predefined break (1 second) after sending an ICMP demand parcel through the ISP1 door.

    Go to IP and Click route then enter the following routes.

    Different Remote Hosts with Netwatch:

    It is conceivable that a solitary remote host may be down, actually taking a look at different remote has per WAN connection including Google DNS and Open DNS is needed to affirm regardless of whether the internet association is truly accessible per WAN connection. In such a manner, utilizing the Netwatch device is by all accounts unfit to adapt to because it upholds just a solitary remote host.


  • QR Code Scanner App

    QR Code Scanner App

    What app do you need?

    Just open the QR Code app to scan the QR code or bar code or pinpoint the camera code, and you’re done! You don’t need to take a picture or press the button. The app will automatically identify any code that the camera is designed for you.
    QR code scanning is, if the code has the URL of any website, it will be automatically redirected to the website. If the code doesn’t have it, we’ll see it immediately. Other formats such as mobile number For contact information or email addresses, you will be prompted to suitable action.

    The QR Code Scanner app is the fastest app and very easy QR scanner & scanner on the code bar. The QR Barcode app is a good & easy reader for every Mobile device.

    QR code scanner is very easy to use, reading QR code. Free QR Code Scanner App very Quick & fast Scan with a QR code or barcode scan whatever you want and start scanning QR Scanner will scan any buttons you don’t need, take pictures, and arrange barcode reader zoom works automatically.

    The QR & Barcode Scanner can scan and read all QR codes/code types including text bar, location, email, URL, ISBN, product, calendar, contacts, Wi-Fi formats, and many more. Included.

    After auto search and encoding, the customer is provided only matching to the individual QR  or barcode type and a suitable action is possible. Coupons To save money. We can very easy way to use the QR barcode reader scanner to scan.

  • Mikrotik WAN Configuration Using Winbox | Access Internet From Vlan

    Mikrotik WAN Configuration Using Winbox | Access Internet From Vlan

    In this article, we will discuss how to access the internet using Vlan.

    Now first of all we need to connect our Mikrotik from pc/laptop using Lan Cable/Patch Cable. Then install Winbox using the following Download button. Then open it now click Neighbors the Winbox will automatically detect your MikroTik click mac address and enter your username. The user name is admin and the password will be blank/empty then click the connect button.

    Now your Mikrotik setting will be open then click interfaces then ethernet Rename interfaces enter a new name Wan1 or as u wish.

    After this, you will go to the vlan tab and create a new vlan by using the plus vlan button. Enter the VLAN name select the VLAN interface as Wan1  and put the vlan id example(1524). Your ISP provider gives u a VLAN id enter your VLAN id and click ok.

    Note: If your ISP provider does not use vlan then skip the vlan setting.

    Now go to IP then address click the + button enter the IP address example: 192.168.10.23/24 select interface (vlan you created) then click the apply button the network option will automatically fill.

    Note Again: If your internet service provider does not provide internet through Vlan then skip it and select interface WAN1 ( Not Vlan ).

    After all please ping your gateway by using the terminal ( ping 192.168.10.12 ) example. If you will receive 0 or 1 ms time your setting will be ok.

    Thanks for visiting our site.

    Thanks for watching.

  • How to Set Bandwith Control on Tp-link Router TL-WR845N

    How to Set Bandwith Control on Tp-link Router TL-WR845N

    In this article, we will learn how to set bandwidth control on a Tp-link router

    First of all, we need to set the Address Reservation
    Address Reservation :

    Why in need of Address Reservations? When our device such as a mobile, or computer connects with a router through wifi or ethernet, the Router will give an IP address automatically with the help of the DHCP Server. When we disconnect our device such as a Mobile Laptop or Pc from the router and connect again the router will give a different IP address. So I will use the address  Reservation. The Address reservation mode gives a static IP address to the specific device.

    Open the Router Setup page using a browser and enter  IP Address  192.168.0.1 or 192.168.1.1 then the router will ask you for the login password the username is admin and the password is also admin.

    After that click the DHCP option and click Address reservation

    click the Add New option fill in all information such as the device MAC address and IP address select status enable then click the save button.

    After all, we need to set bandwidth control in the router. After login click bandwidth control options click enable bandwidth option enter the maximum egress bandwidth and ingress bandwidth limit then click the save button.

    Again click the Bandwidth option and click the Add New button enter the IP address of your device such as mobile pc iPad etc. like 192.168.1.103 then enter the download and upload speed if you want to give 1 Mb Download and Upload then put 1024 and if u want to give half Mb then put 512  egress bandwidth and ingress. After Fill All the blanks then click the save button.

    If u face any problem by saving setting then check Your Fill all information.

    If Your Bandwidth Control does not work properly then Reset your router and configure it again If your router will not work then Check the Router firmware. Change your router Software version.

    Thanks.

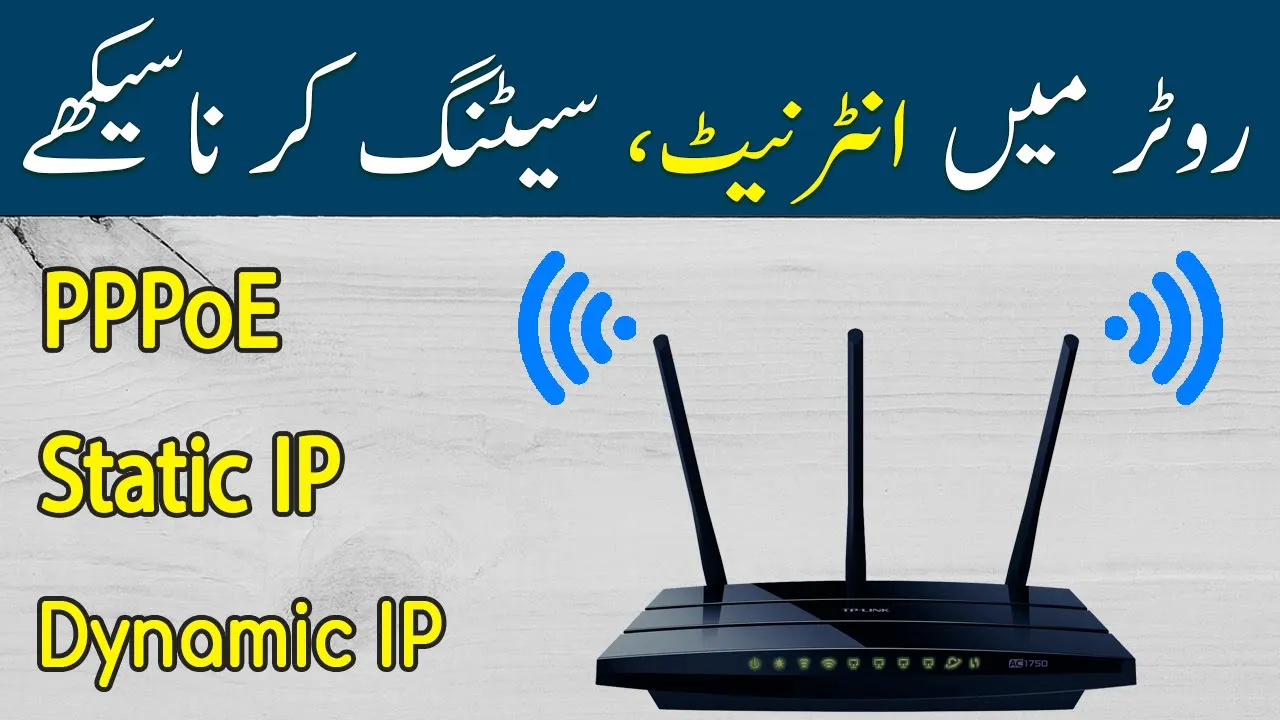
  • How to configure internet setting in Router PPPoE / Static IP / Dynamic IP

    How to configure internet setting in Router PPPoE / Static IP / Dynamic IP

    In this post, I will tell you how to set up an internet setting in a router. There are main three connection types in routers.

    1: PPPoE

    2: Dynamic IP

    3: Static IP

    PPPoE

    We can easily set the PPPoE setting in the router. First of all, we need to connect our router to pc or mobile. Search IP Address 192.168.0.1 in any web browser of mobile or pc. When enter the IP address into the browser Router setting page will open. If you use a mobile then click the right side three lines and then the click second option which is the internet setting. You will see the connection type option click the PPPoE Option and enter your username and password if you know. If you don’t know your username and password then contact your internet service provider. After entering the username and pass then click the ok button and connect the connection wire to the router wan port.

    Dynamic IP

    In the dynamic option, the router will automatically obtain an IP address from your main router or server if the DHCP server is on. If you connect your router through dynamically simple login to your router and click internet setting choose connection type dynamic IP then click the ok button. It will auto-pick ip address DNS from the main router.

    Static IP

    In static IP we can connect internet connection by giving manually IP address gateway subnet default route and DNS. If you want to connect your router from static IP then click the internet option and then connection type choose static IP fill all blank spaces by entering the correct IP or DNS etc. and click the ok button.